How to setup OBS, so you can apply audio filters and effects while screen-sharing on Skype
OBS Studio is a powerful, open-source tool widely used for live streaming and content creation. It can be used when working remotely to provide a professional screen-sharing experience with advanced audio customisation. When working with a high-quality microphone like the USB Blue Yeti, you can leverage noise filters, noise gates, and compression available within OBS to improve clarity.
OBS Studio is a powerful, open-source tool widely used for live streaming and content creation. It can be used when working remotely to provide a professional screen-sharing experience with advanced audio customisation.
When working with a high-quality microphone like the USB Blue Yeti, you can leverage noise filters, noise gates, and compression available within OBS to eliminate background distractions and ensure clear vocal delivery.
The process is a bit complex and due to how Windows handles audio devices it is prone to get reset. In this case simply make sure you follow the steps indicated below to make it work again:
- - Download and install Virtual Cable – https://www.vb-audio.com/Cable/ - Go to Windows / Control Panel / Sound
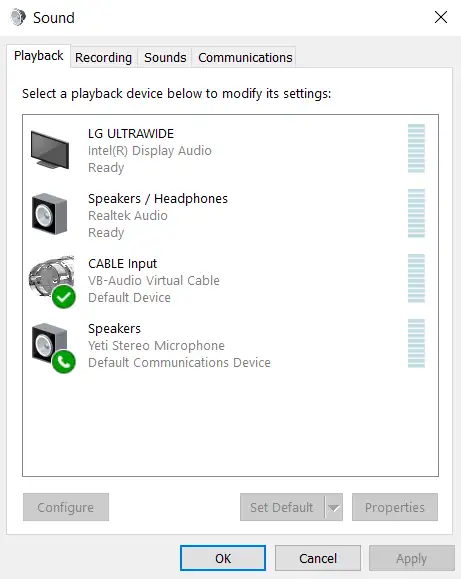
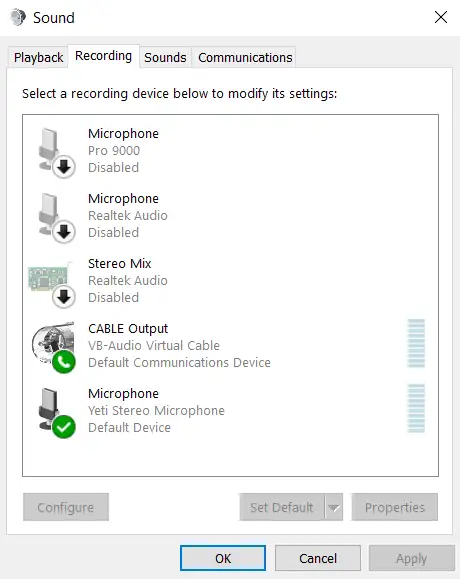
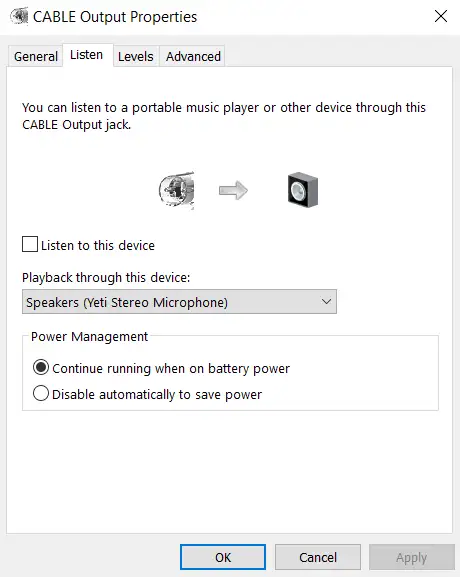
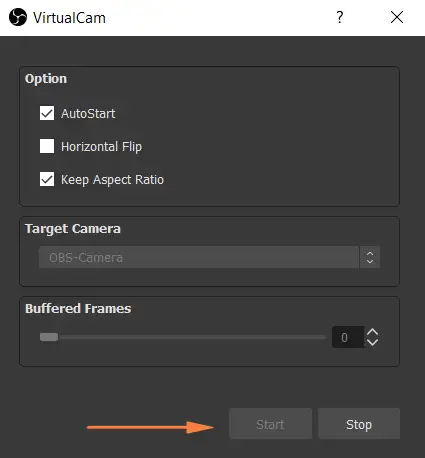
- - Select the *CABLE Output* in the *Recording* tab and set it to your default audio output. Do not select the *Listen to this device* tick. Make the *Cable Input *your default audio in the *Playback *tab. - Download and install *Virtual Cam* – https://obsproject.com/forum/resources/obs-virtualcam.539/
- Launch OBS and make sure the *Virtual Cam* is running.
- - Go to Skype (or any other IM – tested and works on Zoom and Google Meet) and select the Audio and Video sources.
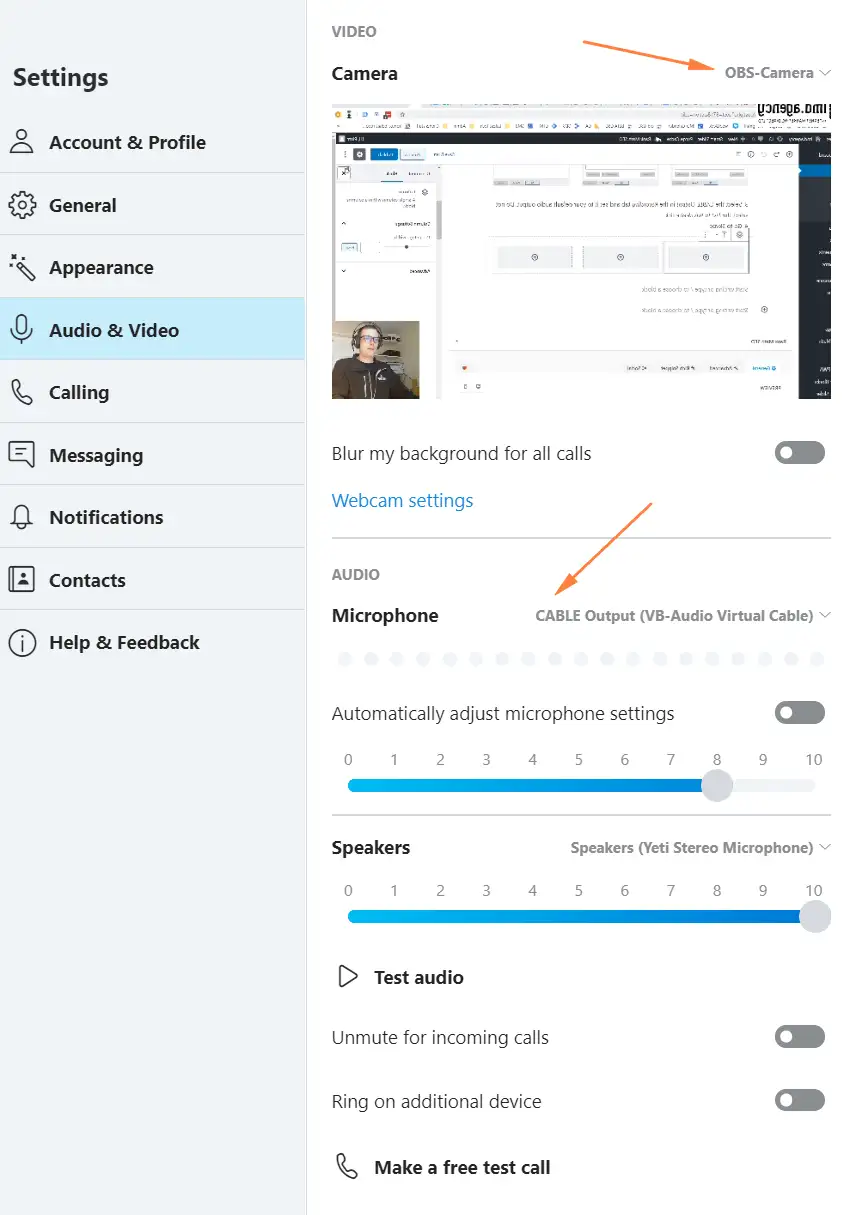
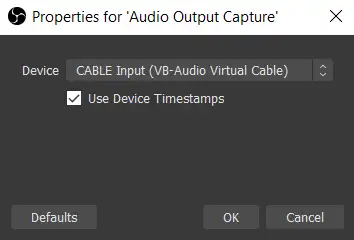
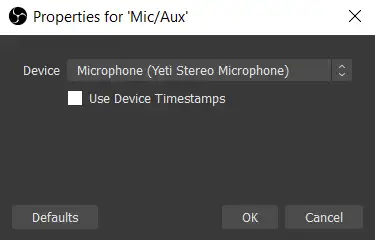
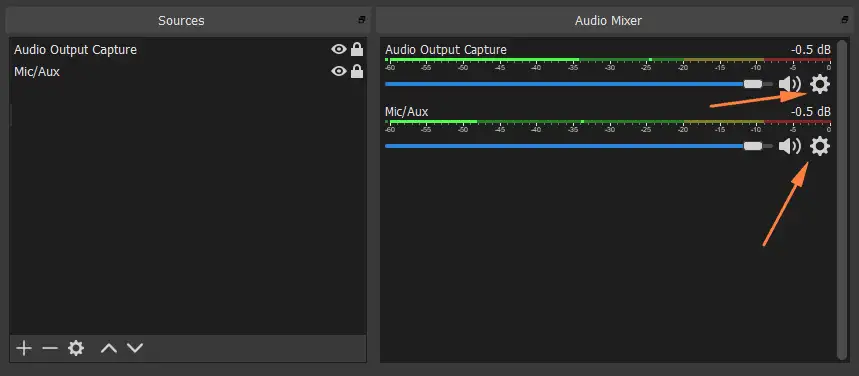
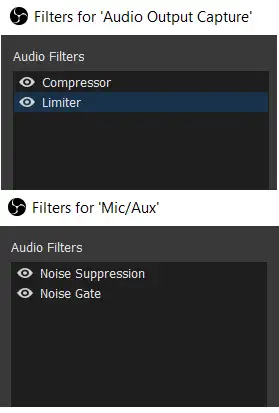
- - Change settings in OBS – add *Mic/Aux* and *Audio Output Capture* to your sources. Add filters by clicking on the gear icon in the *Audio Mixer*.
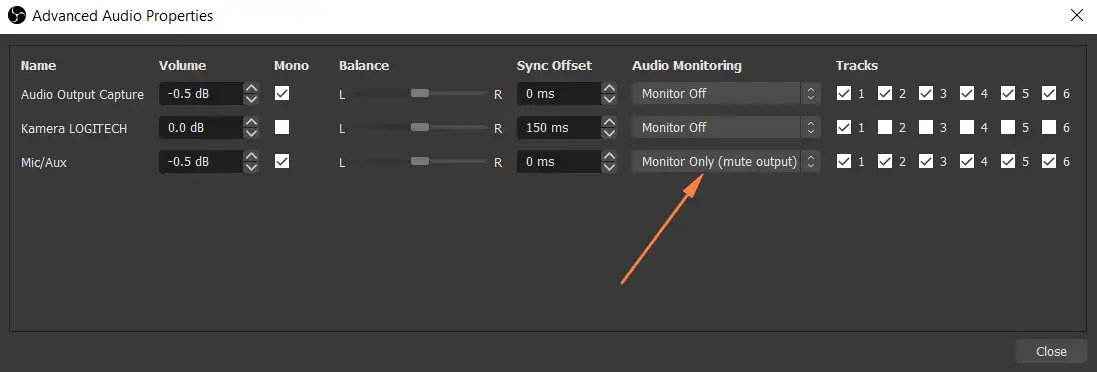
- - The final setting in OBS is enabling the *Audio Monitor* in the *Advanced Audio Properties*.
This is how you enable OBS's advanced sound effects to use them while conference calling.
You found us because of SEO, how is your SEO? Call us on 07902155143 Or request a call back below.